# uncommited file to HEAD git diff <path> # uncommited file to before last commit git diff HEAD^ -- <path> #last commit to before last commit git diff HEAD^ HEAD -- <path> #difference between HEAD and n-th grandparent git diff HEAD~n HEAD -- <path> #Another cool feature is whatchanged command git whatchanged -- <path>
You can use your own commit types, but here are the most common use cases:
feat: a new feature, or change to an existing feature.
fix: Fixing a bug or known issue in code.
test: Adding additional tests for existing features.
chore: Updating build tools, like webpack, gulp, ascripts, etc.
docs: Update to documentation like README, wiki, etc.
Scope
The scope of the commit can be kept as granular as required and is bound to change based on the complexity of the project. If you are starting off a project, it might not seem necessary at the beginning, although, it is highly recommended as it makes you think twice and harder about the changes that you are about to push.
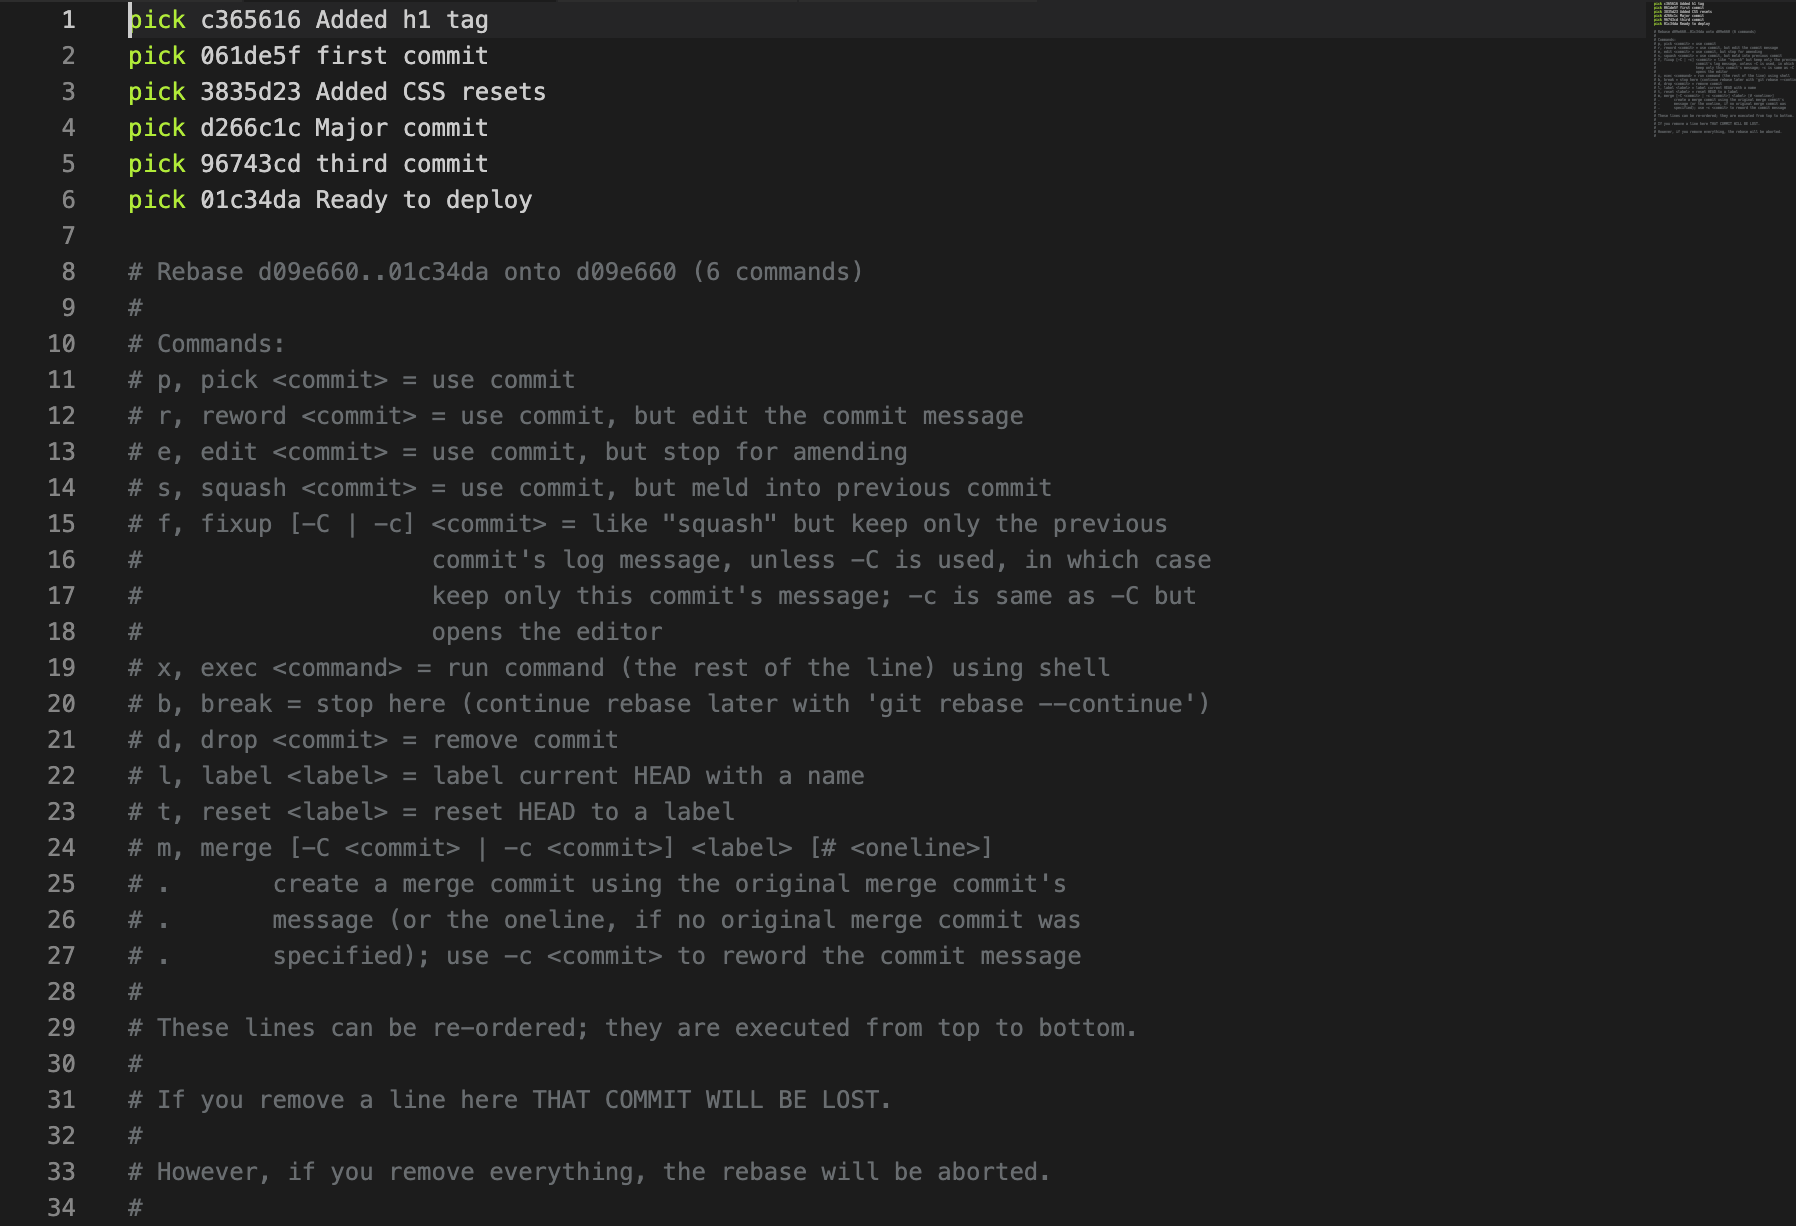
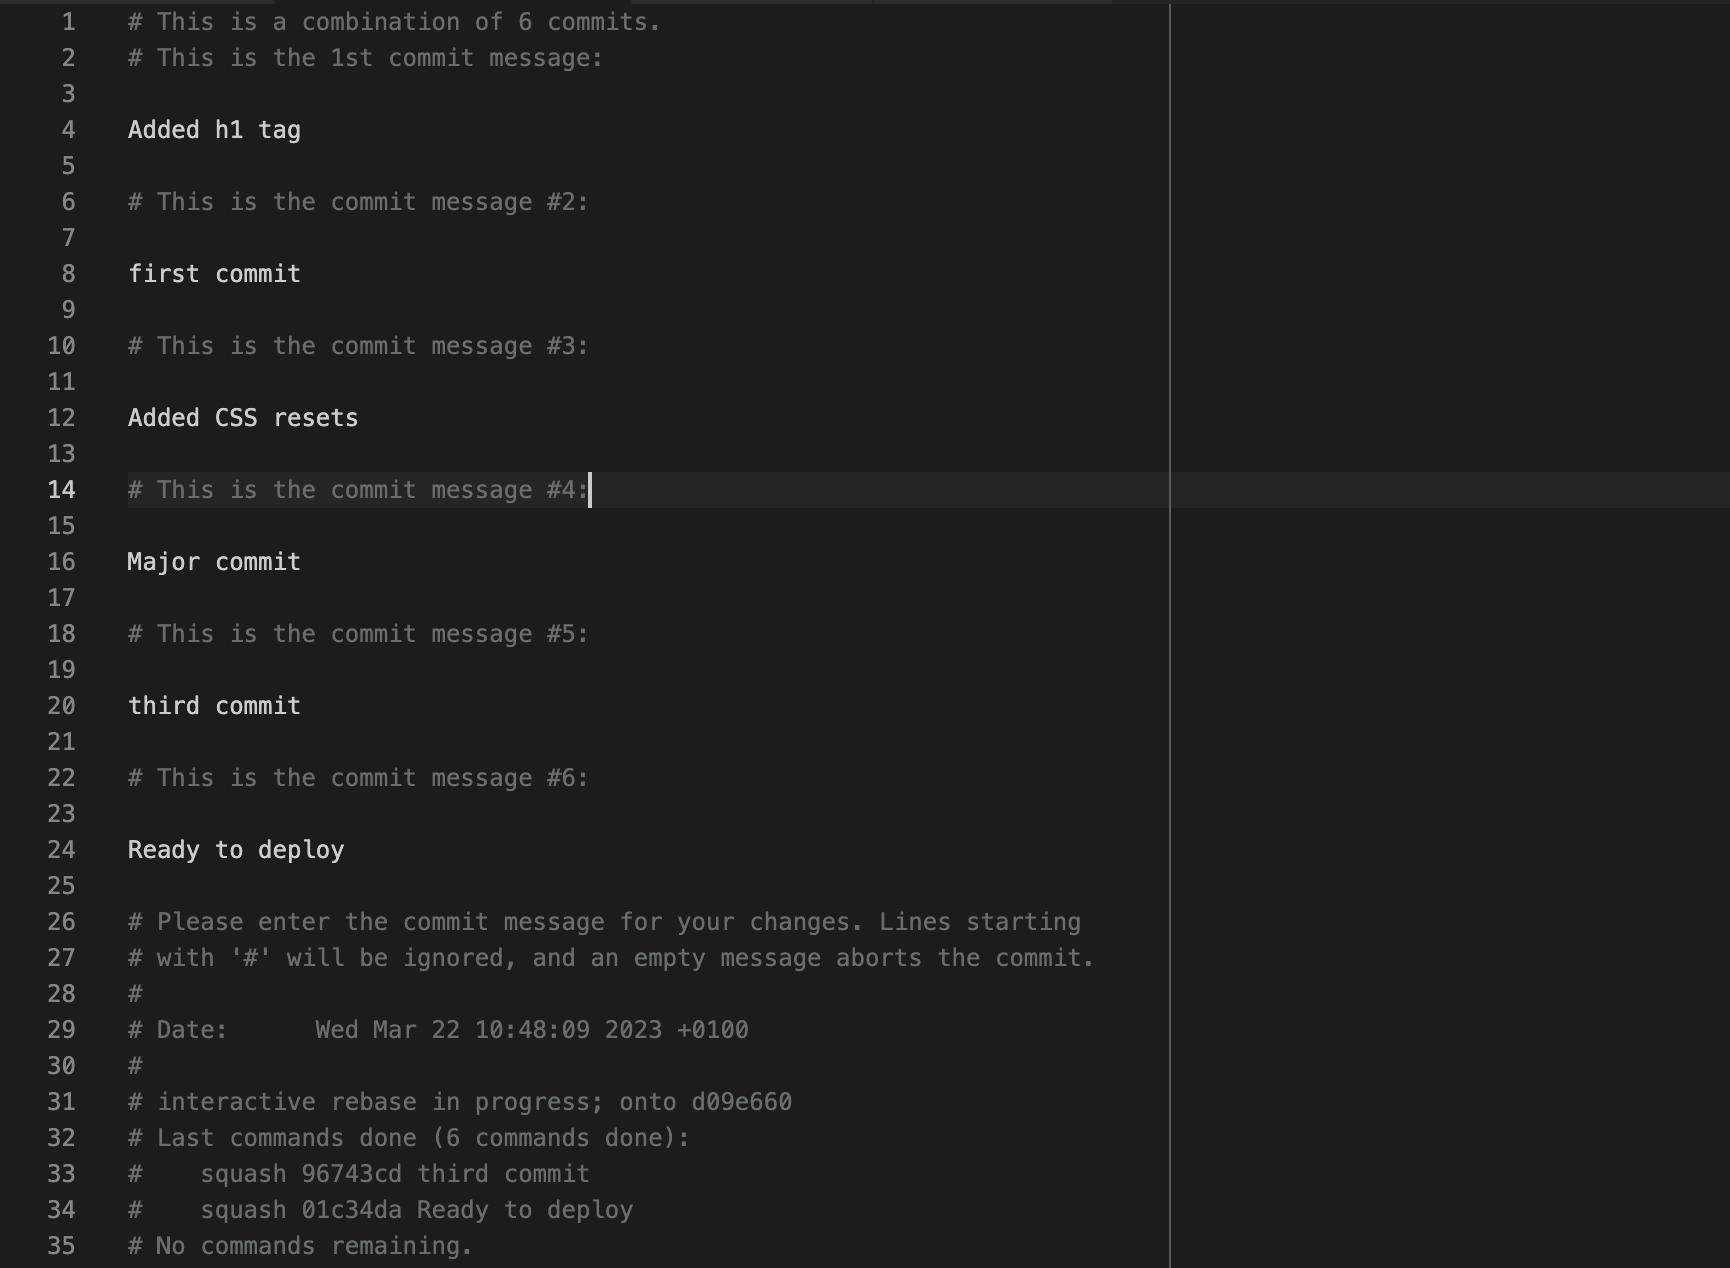
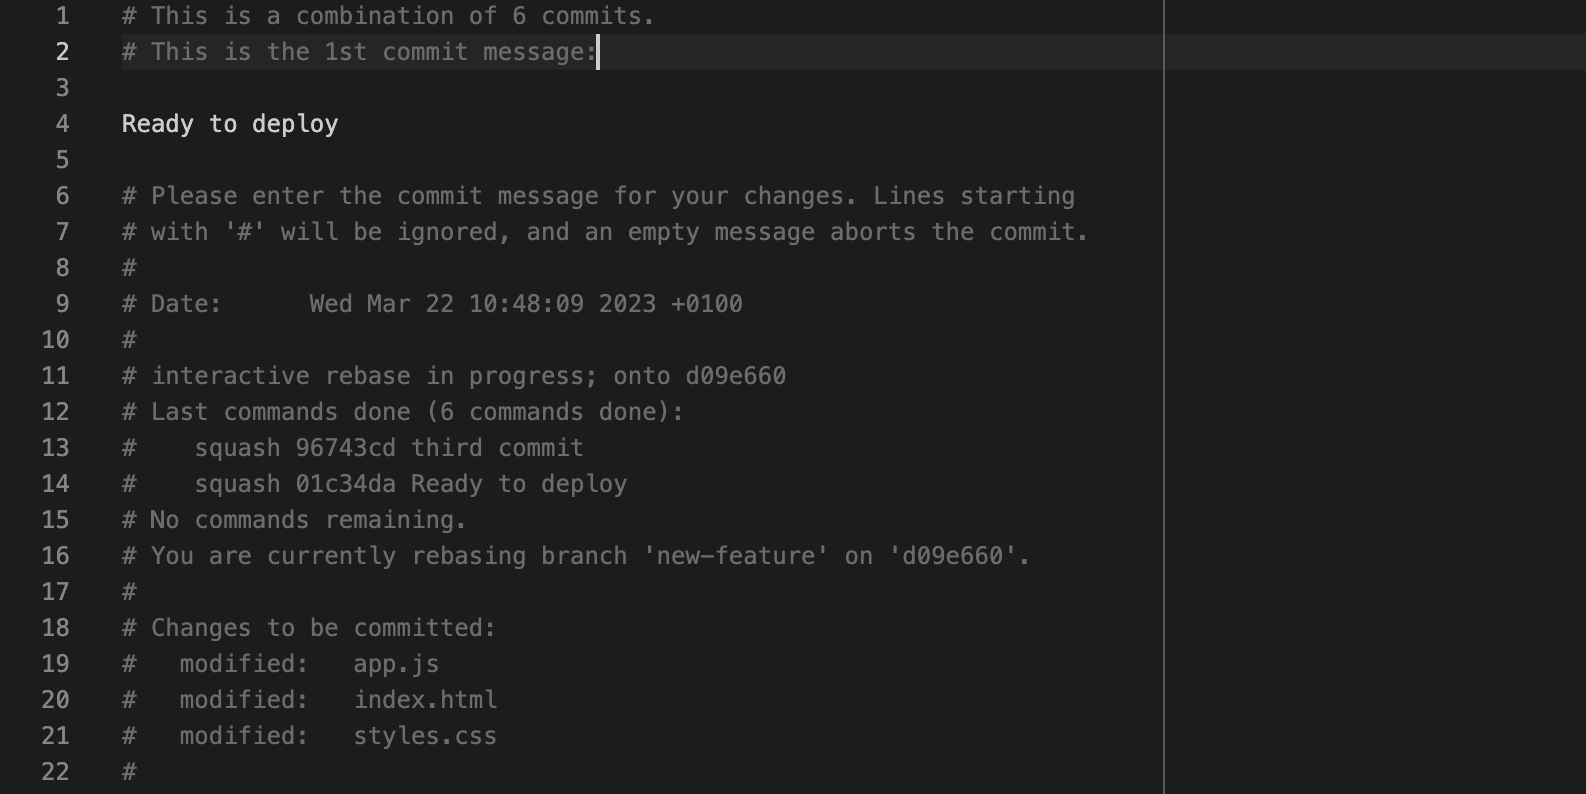
After doing that, save the file and close it. Git will open up another editor where you can see the new commit message it generates for you.
You can get rid of all of them and add your custom message:
Or you can leave it as is. If you add a new commit message, save the file and close it.
Pushing changes, You should run git push to add a new commit to the remote origin. If you have already pushed your commits, then you should force push them using the git push command with — force flag (suppose, the name of remote is origin, which is by default)
Change the current working directory to your local project.
Fetch the branches and their respective commits from the upstream repository. Commits to BRANCHNAME will be stored in the local branch upstream/BRANCHNAME.
Check out your fork’s local default branch - in this case, we use main.
1
2
$ git checkout main > Switched to branch 'main'
Merge the changes from the upstream default branch - in this case, upstream/main - into your local default branch. This brings your fork’s default branch into sync with the upstream repository, without losing your local changes.
If your local branch didn’t have any unique commits, Git will perform a fast-forward. For more information, see Basic Branching and Merging in the Git documentation.
A filter is an object that is invoked at the preprocessing and postprocessing of a request.
It is mainly used to perform filtering tasks such as conversion, logging, compression, encryption and decryption, input validation etc.
The servlet filter is pluggable, i.e. its entry is defined in the web.xml file, if we remove the entry of filter from the web.xml file, filter will be removed automatically and we don’t need to change the servlet.
Usage of Filter
recording all incoming requests
logs the IP addresses of the computers from which the requests originate
conversion
data compression
encryption and decryption
input validation etc.
Advantage of Fliter
Filter is pluggable.
One filter don’t have dependency onto another resource.
Less Maintenance
Filter API
Filter
For creating any filter, you must implement the Filter interface. Filter interface provides the life cycle methods for a filter.
FilterChain
The object of FilterChain is responsible to invoke the next filter or resource in the chain.This object is passed in the doFilter method of Filter interface.
Events are basically occurrence of something. Changing the state of an object is known as an event.
1
We can perform some important tasks at the occurrence of these exceptions, such as counting total and current logged-in users, creating tables of the database at time of deploying the project, creating database connection object etc.
Event classes
ServletRequestEvent
ServletContextEvent
ServletRequestAttributeEvent
ServletContextAttributeEvent
HttpSessionEvent
HttpSessionBindingEvent
Event interfaces
ServletRequestListener
ServletRequestAttributeListener
ServletContextListener
ServletContextAttributeListener
HttpSessionListener
HttpSessionAttributeListener
HttpSessionBindingListener
HttpSessionActivationListener
ServletContextEvent and ServletContextListener
The ServletContextEvent is notified when web application is deployed on the server.
If you want to perform some action at the time of deploying the web application such as creating database connection, creating all the tables of the project etc, you need to implement ServletContextListener interface and provide the implementation of its methods.
Web application > ServletContextEvent > ServletContextListener
HttpSessionEvent and HttpSessionListener
The HttpSessionEvent is notified when session object is changed. The corresponding Listener interface for this event is HttpSessionListener.
We can perform some operations at this event such as counting total and current logged-in users, maintaing a log of user details such as login time, logout time etc.
String string = "SmF2YWNvZGVnZWVrcw=="; // Get bytes from string byte[] byteArray = Base64.decodeBase64(string.getBytes());
// Print the decoded array System.out.println(Arrays.toString(byteArray)); // Print the decoded string String decodedString = new String(byteArray); System.out.println(string + " = " + decodedString);
TimeConvert
1 2 3 4 5 6 7 8 9 10 11 12 13 14 15 16 17
//date format
import org.apache.commons.lang3.time.DateFormatUtils;
String timeStr = DateFormatUtils.format(dateDate,"yyyy-MM-dd HH:mm:ss");
Date dateTime = DateUtils.parseDate(dateTimeStr,"yyyy-MM-dd HH:mm:ss");

SimpleDateFormat sdf = new SimpleDateFormat("yyyy-MM-dd");
Date dateWithoutTime = sdf.parse(sdf.format(new Date()));

//capitalize the first letter of word
String output = input.substring(0, 1).toUpperCase() + input.substring(1);

//measure the time cost
long start = System.nanoTime();
//...
long end = System.nanoTime();
long used = end-start;
System.out.println("used:"+TimeUnit.NANOSECONDS.toMillis(used)+" ms");
classShared { synchronizedvoidwaitMethod() { Thread t = Thread.currentThread(); System.out.println(t.getName()+" is releasing the lock and going to wait"); try { wait(); } catch (InterruptedException e) { e.printStackTrace(); } System.out.println(t.getName()+" has been notified and acquired the lock back"); } synchronizedvoidnotifyOneThread() { Thread t = Thread.currentThread(); notify(); System.out.println(t.getName()+" has notified one thread waiting for this object lock"); } } publicclassMainClass { publicstaticvoidmain(String[] args) { final Shared s = new Shared(); //Thread t1 will be waiting for lock of object 's' Thread t1 = new Thread() { @Override publicvoidrun() { s.waitMethod(); } }; t1.start(); //Thread t2 will be waiting for lock of object 's' Thread t2 = new Thread() { @Override publicvoidrun() { s.waitMethod(); } }; t2.start(); //Thread t3 will be waiting for lock of object 's' Thread t3 = new Thread() { @Override publicvoidrun() { s.waitMethod(); } }; t3.start(); try { Thread.sleep(1000); } catch (InterruptedException e) { e.printStackTrace(); } //Thread t4 will notify only one thread which is waiting for lock of object 's' Thread t4 = new Thread() { @Override publicvoidrun() { s.notifyOneThread(); } }; t4.start(); } }
classMyThreadextendsThread { //Initially setting the flag as true privatevolatileboolean flag = true; //This method will set flag as false publicvoidstopRunning() { flag = false; } @Override publicvoidrun() { //Keep the task in while loop //This will make thread continue to run until flag becomes false while (flag) { System.out.println("I am running...."); } System.out.println("Stopped Running...."); } } publicclassMainClass { publicstaticvoidmain(String[] args) { MyThread thread = new MyThread(); thread.start(); try { Thread.sleep(100); } catch (InterruptedException e) { e.printStackTrace(); } //call stopRunning() method whenever you want to stop a thread thread.stopRunning(); } }
/** * Java program to show, how to use ReentrantLock in Java. * Reentrant lock is an alternative way of locking * apart from implicit locking provided by synchronized keyword in Java. * * @author Javin Paul */ publicclassReentrantLockHowto{
privatefinal ReentrantLock lock = new ReentrantLock(); privateint count = 0;